This secion is dedicated to my documentary on my 1968 camaro rebuild. I nicknamed the first car the "Bondo Bananna" because she was an ugly yellow color, and full of bondo. She was designated as a "parts car" after I found out how bad the shape of the bottom rails on the unibody were. The second car, purchased on the 7th of September 2001, is a stripped down frame and backend, with a much straighter body and frame. Her name is Zippy. Well, she will be. :) Explore the sections below to see the progress I've made.
03-19-10
Starting the stroker up!
Fire it up!.
05-18-06
This update spans a long time. Buying a house wasn't
the best thing for the Camaro's progress, although my current garage is
now set up much better than the one at Stencar. :) Anyways, these pics
mostly detail bodywork on various body
panels.
06-01-04
This update includes bodyfiller fun on the roof,
headliner installation, and patching some rust on the passenger door.
Here's the pics.
01-15-04
THE ENGINE IS ALIVE!!!! :)
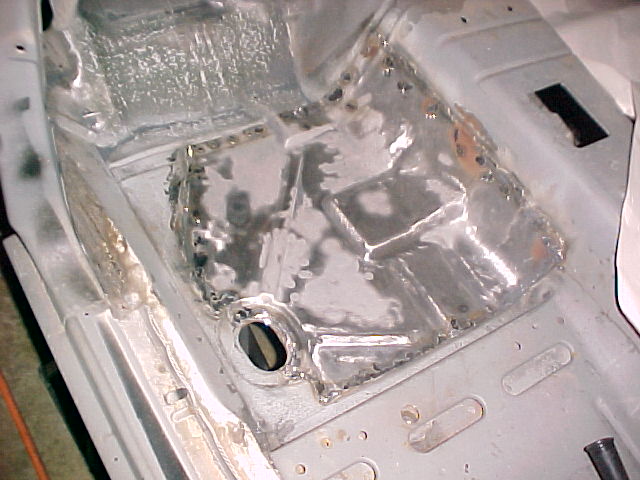
10-14-03
Okie, another update. This shows cutting up the bondo
bananna, axle inspection, and the current state of the engine compartment.
Here's the pics.
05-28-03
Geez, I'm bad at updating this puppy. Anyways, here's
quite a span of pictures, ranging from trans disassembly, rear end painting,
old engine inspection, new engine installation, etc. Lots of good stuff.
At some point I'll put a table of parts on the site describing what the
new motor is composed of.
Here's the pics.
02-06-03
Engine yanking and disassembly. The goal of the engine
disassembly isn't to put the thing through a full rebuild (I was told the
motor had already been rebuilt when I bought the bugger), but rather to
find out anything wrong with it. It turns out, there was enough wrong so
far to catch my attention!
Here's the pics.
01-16-03
The back panel all welded on, the front suspension
getting assembled, and the beginnings of engine disassembly.
Here's the pics.
11-18-02
Putting epoxy primer on various surfaces, new brakes,
fixing the fender aprons, and fitting the rear panel.
Here's the pics.
10-07-02
I removed the springs and control arms to prepare a
batch of parts to get powdercoated.
Here's the pics.
08-25-02
Painting! I finally have the interior painted!
Here's the pics.
07-16-02
This update shows the fitting and a small bit of welding
the patch panel to the car.
Here's the pics.
06-11-02
This update includes: removing the back panel,
preparing the patch panels, and my grinder eating my thumb for lunch.
Warning... the picture of the thumb is pretty, well, graphic. If you're feelin'
queasy right now, I'd suggest you come back later.
Here's the pics.
04-09-02
Holy crap I haven't been doing a good job of updating
this page! Anyway, Dave and I have been real busy working on the car...
just about every weekend we do something to it.
Here's some picsof what we've done. A
"breif" list of accomplishments since the last entry:
01-31-02
Just wanted to post a picture of the driver's side
floor completely installed. The only thing left is to paint and seam-seal
it. The picture is here.
01-14-02
I finally broke down and bought a migwelder this
weekend. I got a sweet deal on a end of year model - the Millermatic
135. The 135 model is slated to be replaced this year by the Millermatic
130. In any case, I owe a lot to Peter, my autobody instructor, for
finding the welder for so cheap. The pictures of the results of sunday's
welding are here.
October 2001
I'm too lazy to break this up into seperate days.
This link will take you to pictures of
removing the patch panel, Colin working on his Volvo, and stripping primer
off the front subframe.
9-24-01
Lots of misc work was done this weekend to Zippy and
The Bananna. Dave R. took apart some of the front from the Bananna, and
I attempted to work on the front suspension of Zippy. I ran into the
slight speedbump that the springs won't cooperate with me until I get the
weight of the engine in the car. The only other problem with it is that
the springs may be heavy duty, since the car origionally came with a big
block. The Bananna's engine is a small block 327. Hrm... more issues.
Anyway, enough talk. Here's some
pictures.
9-7-01
It's been a long time since I've wrote an entry. I
looked at a "shell" (front subframe and back unibody, completly stripped)
today. A Camaro Generations
club member sold it to me for a great deal. Delivery will be soon.
It's history includes:
8-14-01
Today was a very sad day in my work with the Bananna.
I found some serious structural problems with the car. Today the Bananna
was determined to have "no hope" of a quality restoration, and is now
just a parts car.
here.
8-2-01
Picking at the passenger side bondo. Pics are
here.
8-1-01
I've finally put this section up. Issues with DSL
installation has been delaying my website from operation. I purchased
two bulbs for the other flourescent fixture yesterday. Mmmm... light.
7-30-01
Yup... more bondo peeling. It's more of an exploratory
exercise than anything else. I've already resolved I'm going to replace
the panels, but I want to see how bad things are under the thick layer of
bondo. Plus I'm gonna need to clear away the bondo at the seams anyway.
The bucket that I'm filling with bondo scraped off of her is almost
1/4 full! Some pics are here.
7-26-01
More bondo peeling. I got smart and bought a small
propane torch. Now I heat the bondo from inside and peel it off with a
putty knife. Some pics are here.
7-25-01
I picked at some bondo with my screwdriver in the back.
You can see what I found here.
7-24-01
This is the first "work session" that I did with the car.
I made my drill don a nifty wirewheel, and went to work on the rear window
bottom panel. After I raised up a ton of dust, I picked at some bondo for
a while with my screwdriver. Probably about 1.5 hours of work. Pics are
here.
7-19-01
This is the day the ownership transfered to me, for the
price of $4500. She was brought over on a flatbed truck, and dumped off
in the middle of the street. Thank god she runs, otherwise I wouldn't have
been able to get her up the driveway! In either case, I need a lot of
edumacation on my stickshift too... it took a while and a few restarts to
get it in the garage. Some pics of her are
here. Kudos to my roomie Kevin who
let me borrow his hi-res digital camera!